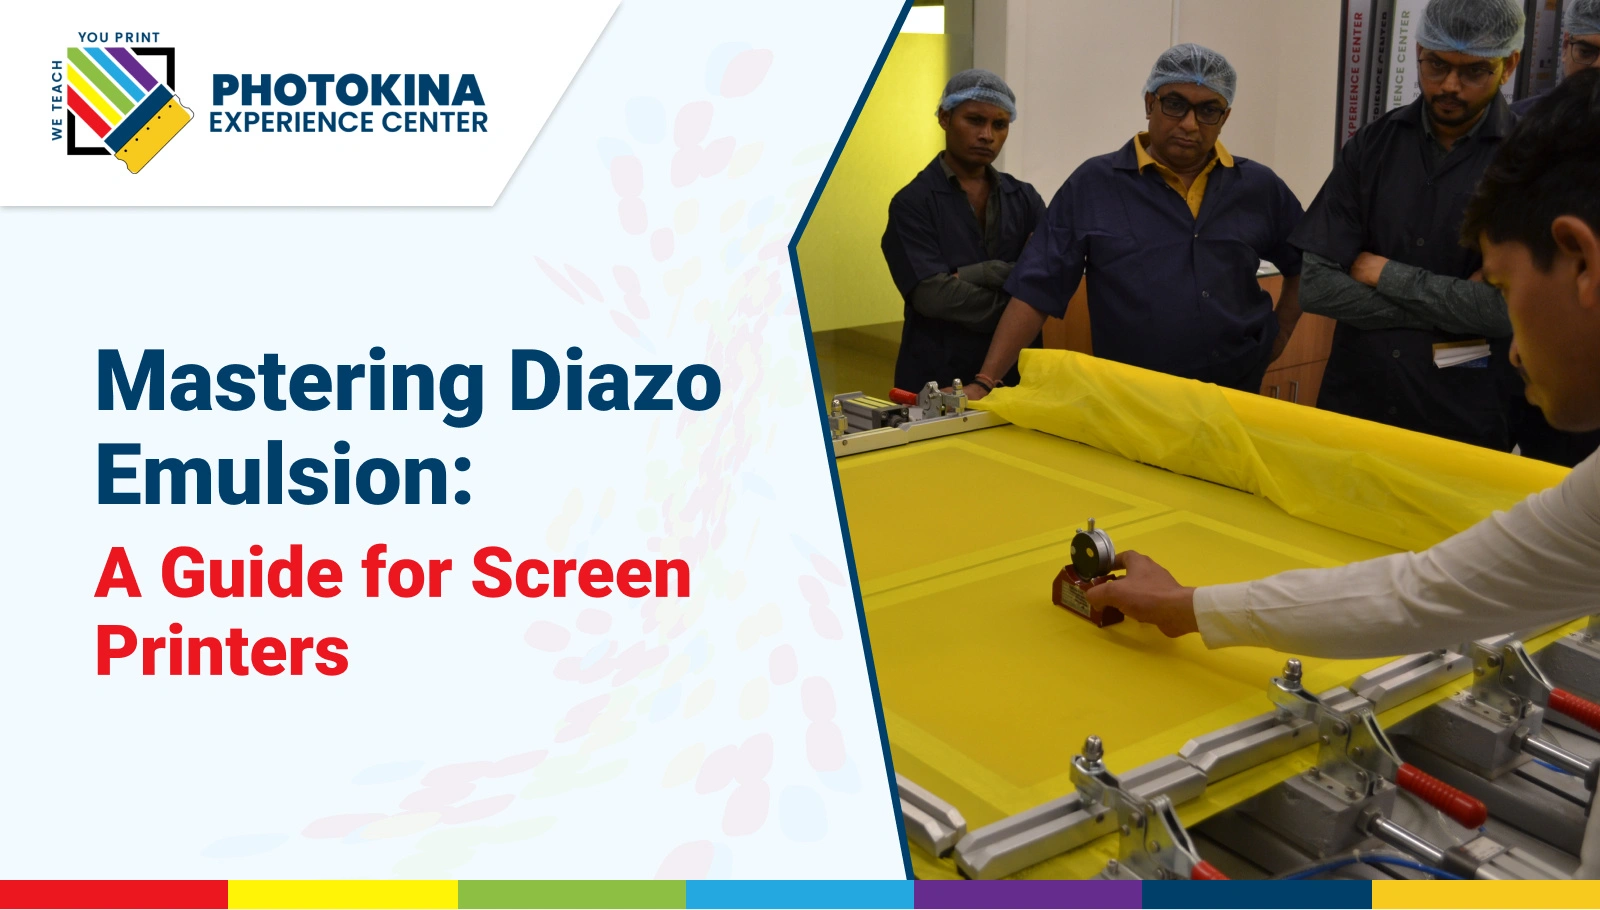
Mastering Diazo Emulsion: A Guide for Screen Printers
Diazo Emulsion
Mastering Diazo Emulsion: A Guide for Screen Printers
Screen printing is an artistic and versatile process that relies on using the right tools and materials to achieve professional-quality results. Among these, Diazo Emulsion plays a crucial role in creating durable and precise stencils on the screen. Whether you're new to screen printing or looking to refine your techniques, understanding how to properly handle and apply Diazo Emulsion is essential. In this guide, we’ll cover everything you need to know about Diazo Emulsion, from its properties and preparation to its application and troubleshooting.
What is Diazo Emulsion?
Diazo Emulsion is a light-sensitive chemical compound used in screen printing to create stencils. It consists of two parts: an emulsion base and a sensitizer, often in the form of diazo powder or liquid. When mixed, the emulsion becomes sensitive to UV light, allowing it to harden upon exposure. This hardening forms a stencil on the screen, allowing ink to pass through specific areas to create your design.
Why Choose Diazo Emulsion?
Diazo Emulsion is highly regarded for its versatility and durability. It’s compatible with both water-based and plastisol inks, making it suitable for a wide range of printing projects. Additionally, Diazo Emulsion strikes a good balance between ease of use and its ability to capture fine details, making it ideal for both beginners and experienced screen printers.
Preparing Diazo Emulsion
Proper preparation of Diazo Emulsion is key to ensuring consistent and high-quality results. Here’s how to get started:
- Mixing the Emulsion: Begin by mixing the diazo sensitizer with the emulsion base. The sensitizer might come in powder or liquid form. If it’s in powder form, dissolve it in distilled water before adding it to the emulsion. Mix thoroughly until the consistency is smooth and uniform
- De-bubbling: After mixing, let the emulsion sit for a few minutes to allow any bubbles to dissipate. Bubbles in theemulsion can cause imperfections in the stencil, which could lead to poor print quality.
- Storage: Once mixed, store Diazo Emulsion in a cool, dark place to prevent premature exposure to light. The shelf life of the mixed emulsion is typically a few weeks to a couple of months, depending on storage conditions and the brand.
Coating the Screen with Diazo Emulsion
Applying Diazo Emulsion to your screen is a critical step that requires precision to ensure an even coating. Follow these steps for optimal results:
- Clean the Screen: Before applying the emulsion, ensure the screen is clean and free of oils, dust, or residues. A clean screen will help the emulsion adhere properly, preventing flaws in the stencil.
- Coating Procedure: Using a scoop coater, apply the Diazo Emulsion evenly to both sides of the screen. Start with the print side, then coat the squeegee side. Hold the coater at a consistent 45-degree angle and apply with smooth, steady strokes. Be sure to cover the mesh evenly, avoiding thick or thin spots.
- Drying the Screen: Place the coated screen in a dark, dust-free area to dry. To ensure even drying, place the screen horizontally with the print side facing down. You can use a fan or dehumidifier to speed up the drying process, but avoid using heat, as it may prematurely expose the emulsion.
Exposing Diazo Emulsion
Once the Diazo Emulsion has dried, the next step is exposing it to UV light to create the stencil. The exposure process hardens the emulsion in the areas not covered by your artwork, leaving behind the stencil.
- Setting Up the Exposure: Place your artwork, printed on a transparent film, on the screen with the printed side against the emulsion. Align it correctly and secure it with transparent tape or a vacuum frame from an exposure unit.
- Choosing the Right Light Source: The UV light source you use will determine the exposure time. Options include UV bulbs, sunlight, or specialized exposure units. Follow the manufacturer’s guidelines for the correct exposure time based on the light source and the thickness of your Diazo Emulsion layer.
- Exposure Time: Expose the screen for the recommended time. Overexposure can cause the stencil to harden too much, making it difficult to wash out, while underexposure can result in a weak stencil that doesn’t hold up during printing.
- Washing Out the Stencil: After exposure, gently rinse the screen with cold water to remove the unexposed Diazo Emulsion. The areas where light was blocked by the artwork will wash away, revealing a clean stencil. Be cautious not to use too much pressure during washing, as it may damage the stencil.
Troubleshooting Common Diazo Emulsion Issues
Even with the right preparation, problems can arise when working with Diazo Emulsion. Here are some common issues and their solutions:
- Uneven Coating: If the emulsion coating is uneven, it may be due to improper coating technique or a dirty screen. Clean the screen thoroughly and practice applying the emulsion evenly for better results.
- Underexposed Stencil: If the stencil washes out too easily or doesn’t hold up during printing, it may be underexposed. Increase the exposure time or use a more powerful light source.
- Overexposed Stencil: If the emulsion is difficult to wash out and the stencil becomes too rigid, it may be overexposed. Reduce the exposure time or move the light source further from the screen.
- Pinholes and Imperfections: Small pinholes in the stencil can be caused by dust on the screen or bubbles in the emulsion. To fix them, use a small brush and some emulsion to touch up the affected areas.